


Introduction
We are all experiencing JS Framework(angular, react, vue, ojet..etc) era, So we would have forgotten some of the VanillaJS useful methods as we don't use them very often, Here is the recollection 👀
As a Javascript developer, we would have come across append(),appendChild(),..etc to add elements in dom. Here we will discuss multiple other ways as well.
Look at the below simple div hierarchy, we will be playing around with these elements throughout this article.
HTML
<body>
  <div id="parent">
    <div id="child1"></div>
  </div>
 </body>
So, Lets get started! (we will be using below sibbling1 and child1 also other variables as we go along with topics)
const sibbling1 = document.createElement("div");
sibbling1.setAttribute("id", "sibbling1");
const child1 = document.createElement("div");
child1.setAttribute("id", "child1");
const parent = document.querySelector("#parent");
1. appendChild()
This method will help to add an element at end of children of the parent element.
For example, lets add child2 element in parent element.
parent.appendChild(child2)
It will become like below
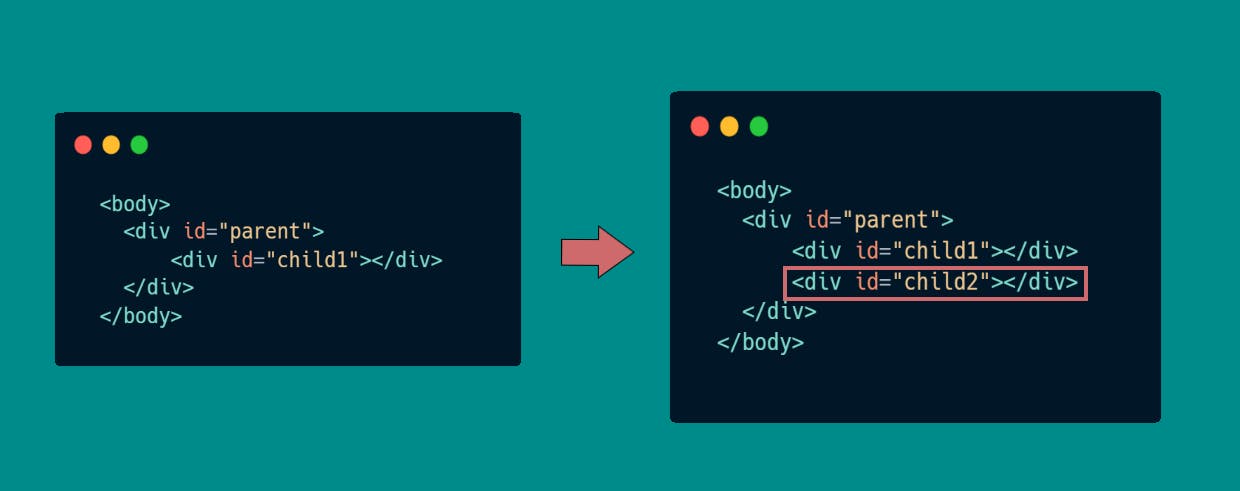
explanation: child2 element has been added after the child1 element, This is because appendChild() method will append an element to the end of children( here only one children i.e child1) of a parent element, also you can add only one element at a time. So how to add multiple elements together? 🤔 now go to the next topic 😉
2. append()
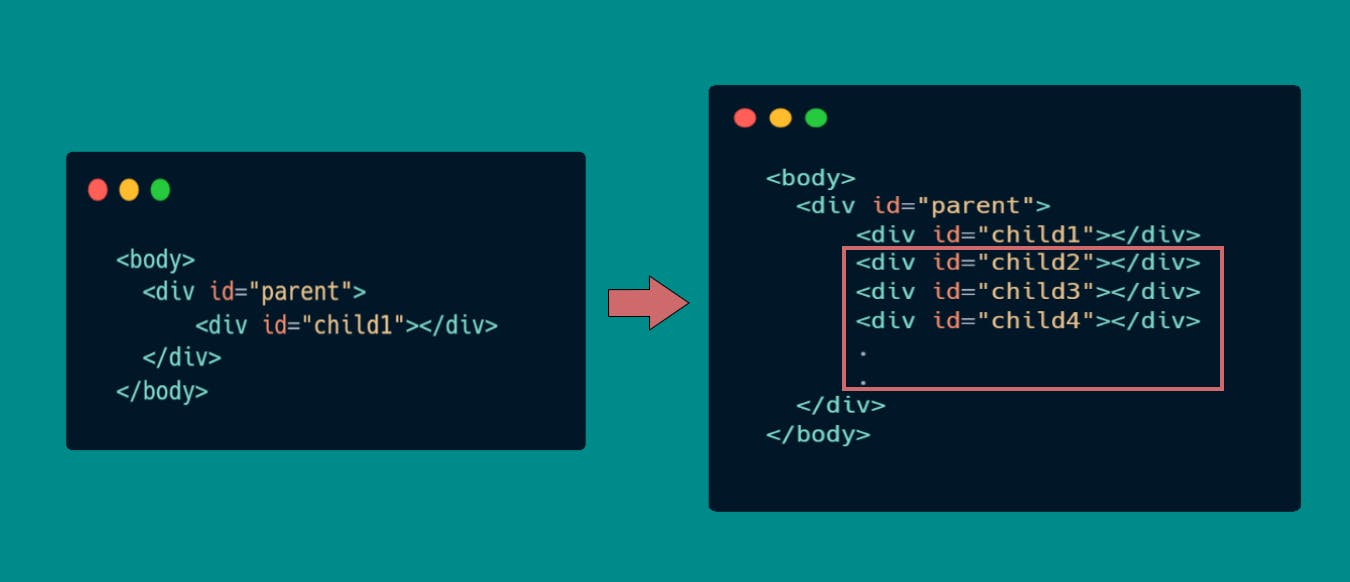
Like appendChild(), It will add element at end of children of the parent element, But we can add multiple elements simultaneously using append(). This is the major difference between both of them
parent.append(child2,child3,child4,..etc)
Output:
Task: 💪 Now your turn to code! Try to append multiple elements to body and see how it behaves 😊
3. prepend()
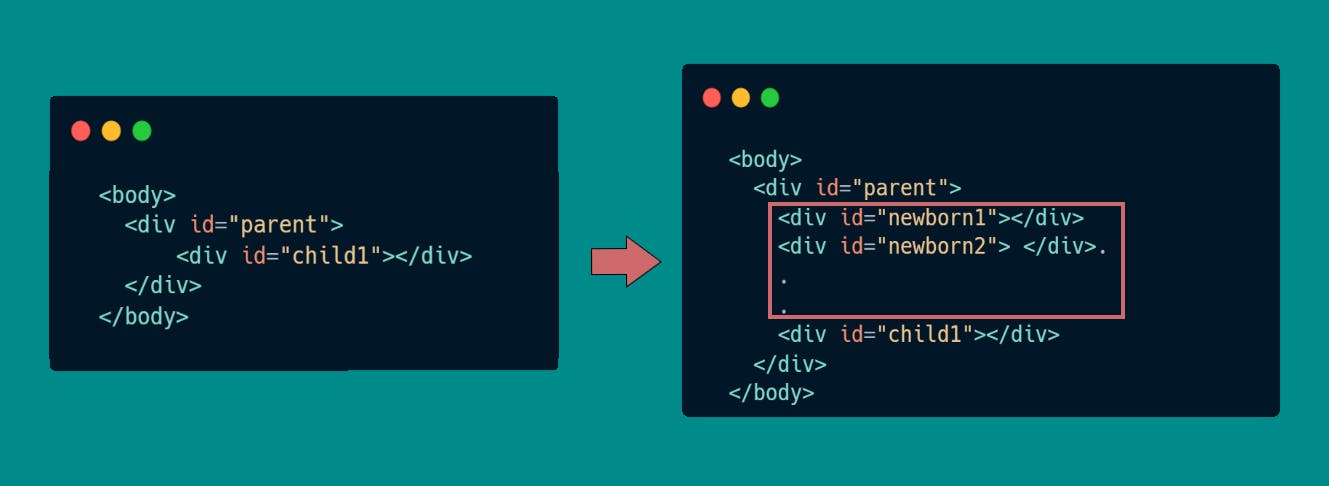
This method will add elements before first child of the parent element. As you can see, multiple elements are allowed here
parent.prepend(newborn1,newborn2..etc)
Output:
4. after()
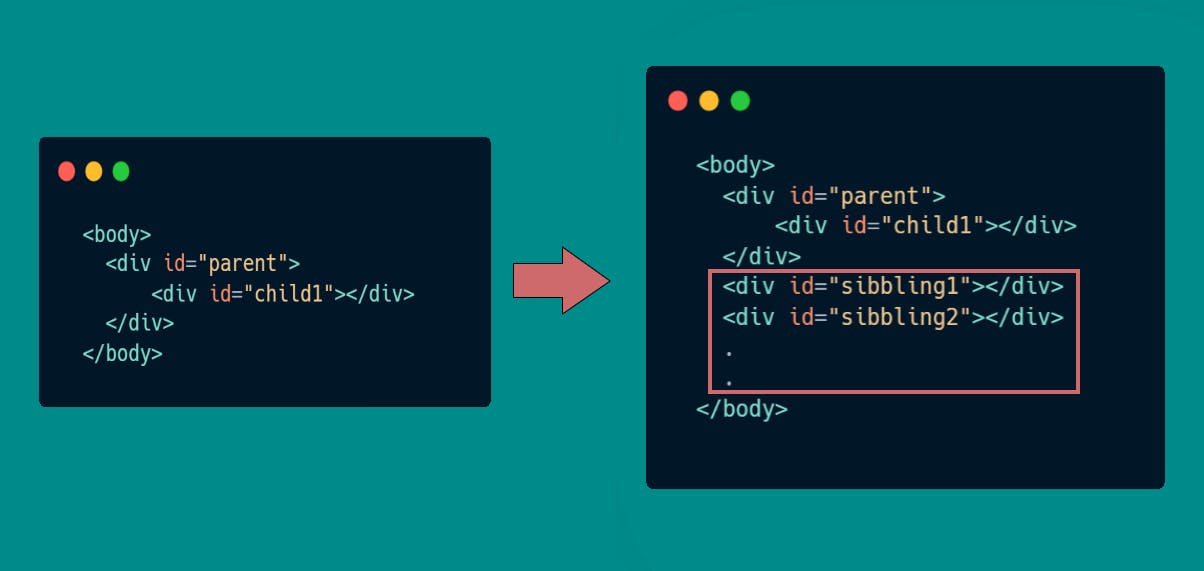
This method will add elements after the parent element. for example,
parent.after(sibbling1,sibbling2..etc)
Output:
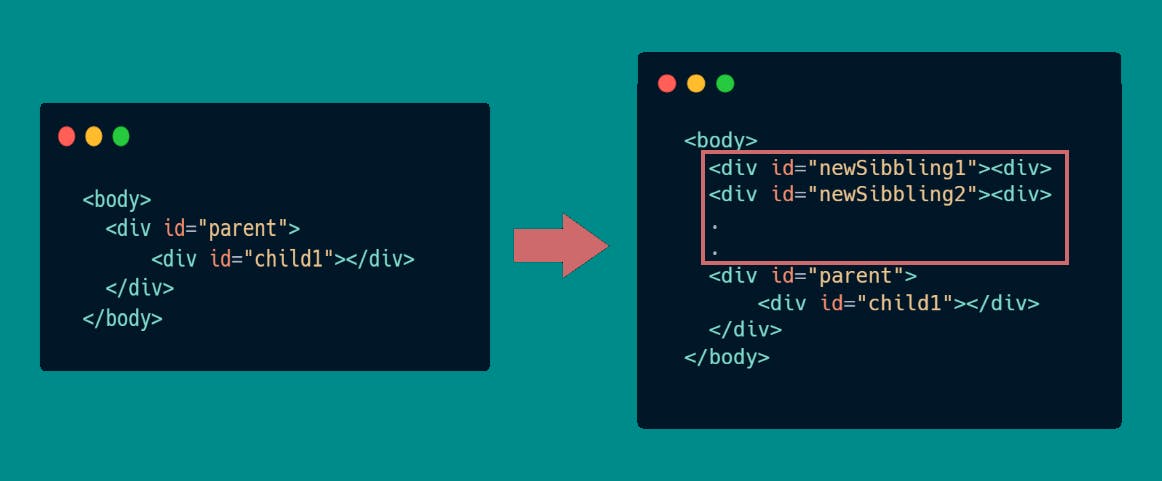
5. before()
This method will add elements before the parent element. for example,
parent.before(newSibbling1,newSibbling2,..etc)
Output:
6. insertAdjacentElement()
This is my favourite method 😍, This method will insert an element based on the position, no worries, I will tell what i mean.
There are 4 positions beforebegin, afterbegin, beforeend and afterend. You can add an element based on the positions, It gives you full control of where you need to place an element, Isn't it awesome 😎
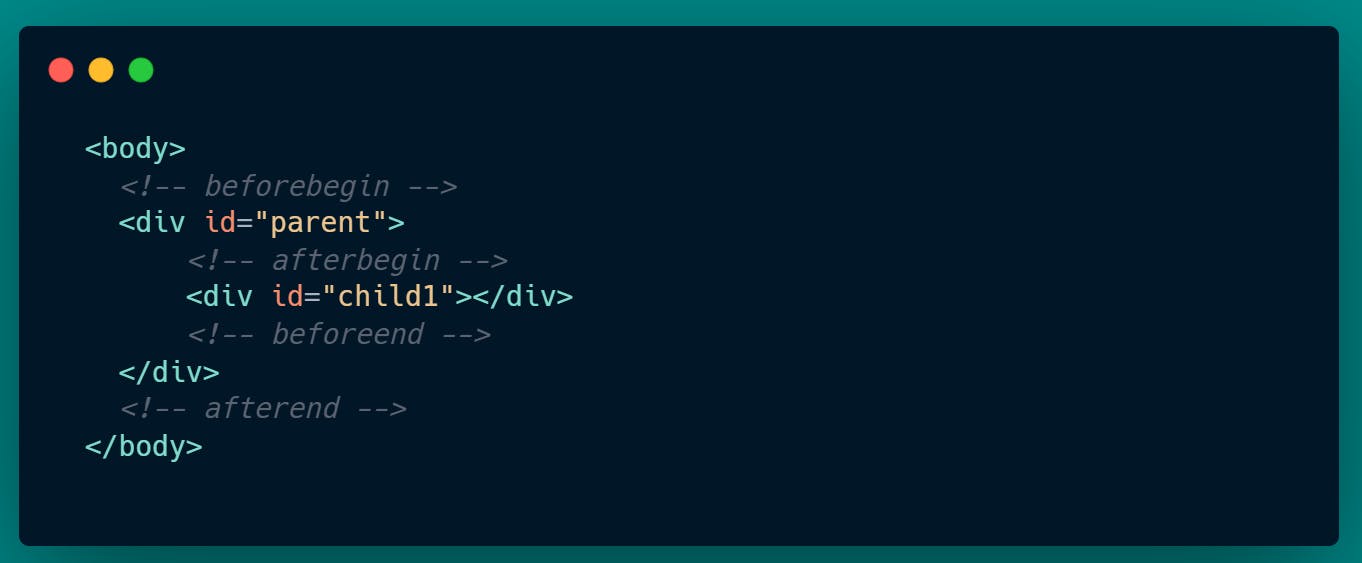
Here parent element is our targeted element. Lets code for this
const beforeBegin = document.createElement("div");
beforeBegin.setAttribute("id", "beforeBegin");
const afterBegin = document.createElement("div");
afterBegin.setAttribute("id", "afterBegin");
const beforeEnd = document.createElement("div");
beforeEnd.setAttribute("id", "beforeEnd");
const afterEnd = document.createElement("div");
afterEnd.setAttribute("id", "afterEnd");
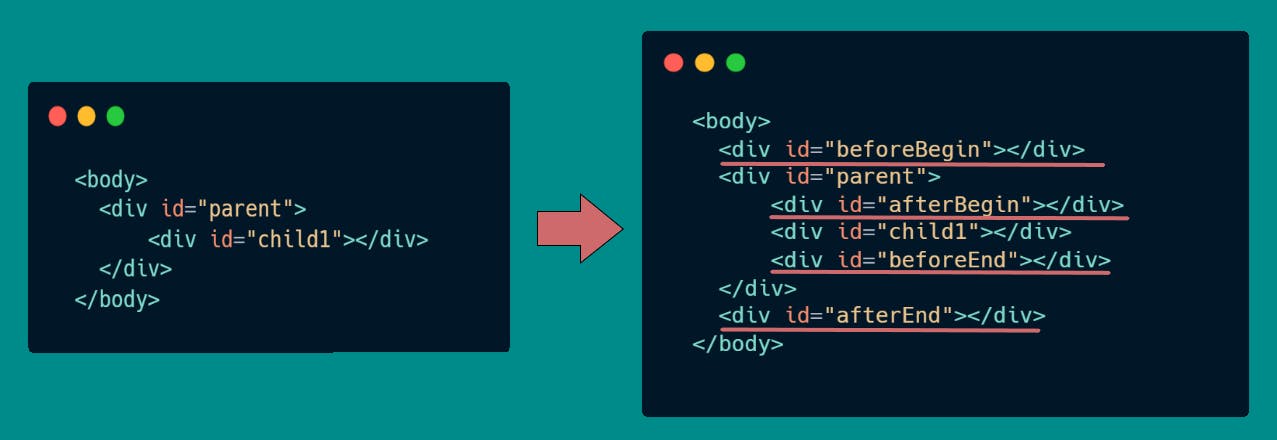
parent.insertAdjacentElement('beforebegin',beforeBegin);
parent.insertAdjacentElement('afterbegin',afterBegin);
parent.insertAdjacentElement('beforeend',beforeEnd);
parent.insertAdjacentElement('afterend',afterEnd);
The output will be like,
Task:💪 Now your turn to code 😉, Consider body as a target element and try to add 4 elements in those 4 positions and see how it behaves.
Note: insertAdjacentText() will add text rather than element and insertAdjacentHTML() will add HTML content instead of element and both are similar to insertAdjacentElement() with respect to position.
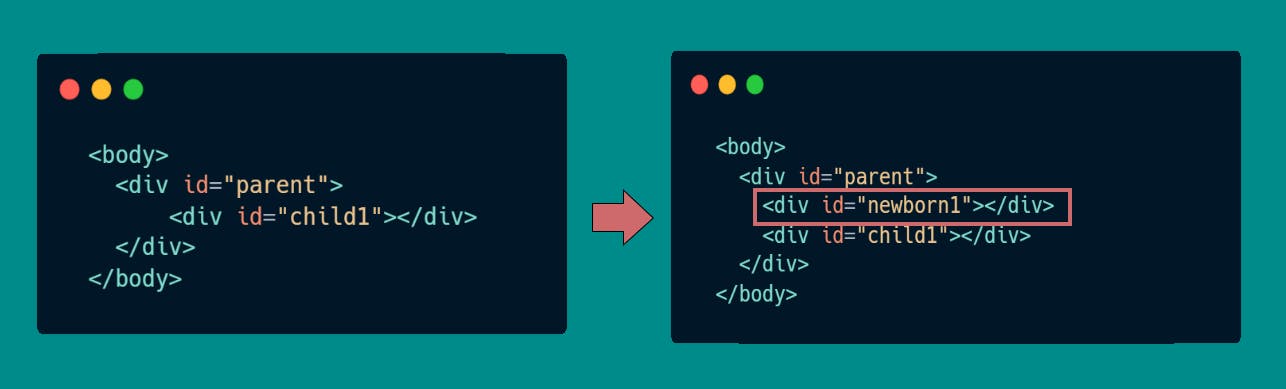
7.insertBefore()
This is similar to prepend method, but insertBefore() will add only one element at a time whereas prepend() will add multiple elements simultaneously.
parent.insertBefore(newborn1, child1)
Output:
8. replaceChild()
Very Simple, Old Child will be replaced with New one😁 replaceChild(newChild, oldChild);, Lets see in action.
Lets create a new child as newborn will replace with child1 inside parent element
const parent = document.querySelector("#parent");
const child1 = document.querySelector("#child1");

const newborn = document.createElement("div");
newborn.setAttribute("id", "newborn");

parent.replaceChild(newborn, child1);
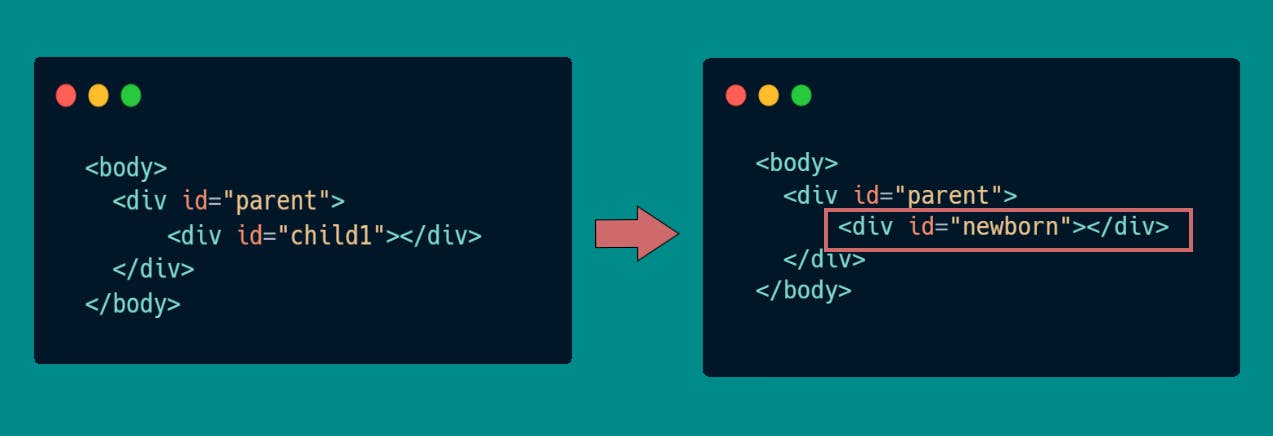
Note: This method will replace only one child at a time, Lets jump to next method which will help to replace multiple child simultaneously. 😉
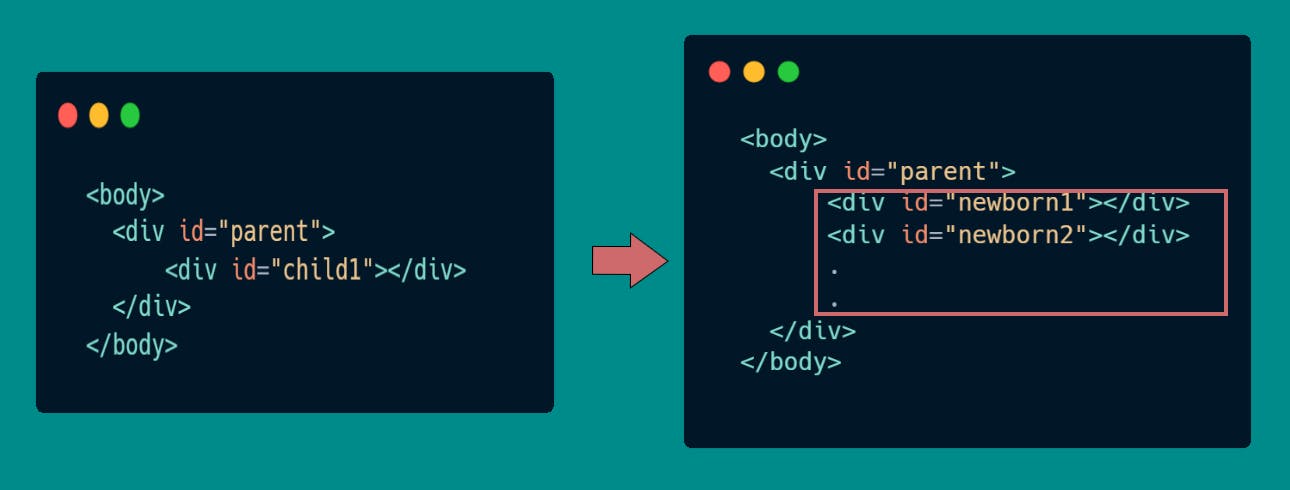
9. replaceChildren()
This method will replace the entire children of the parent element with the given elements(newborn1,newborn2).
parent.replaceChildren(newborn1, newborn2,..etc)
The output will be like this,
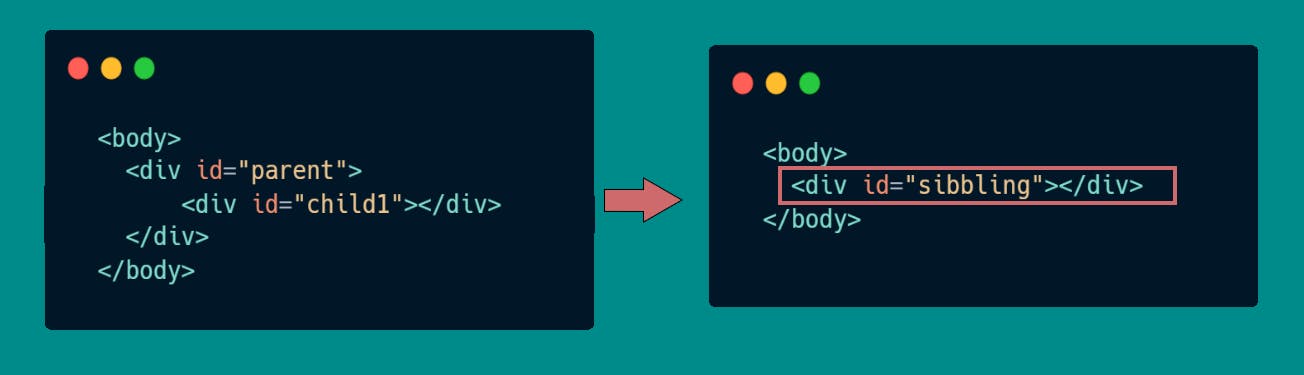
10. replaceWith()
This method will not only replace child element, But also the mentioned parent (with) element. Lets see in Action. Lets create sibbling element and try to replaceWith.
const parent = document.querySelector("#parent");

const sibbing = document.createElement("div");
sibbing.setAttribute("id", "sibbing");

parent.replaceWith(sibbing)
The output will be like this,
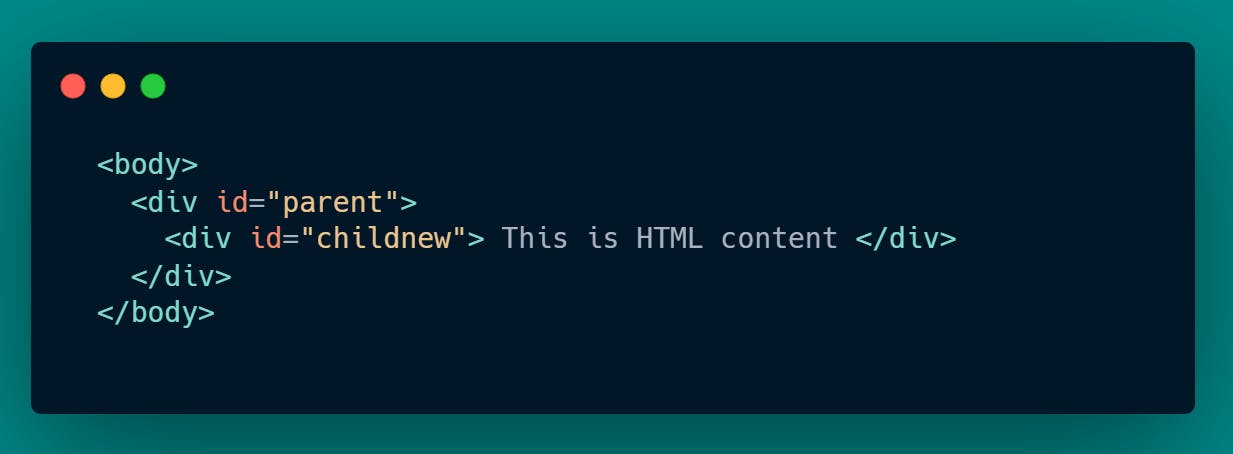
11. innerHTML
You can literally insert HTML inside the parent element.
const parentElement = document.getElementById("parent");
parentElement.innerHTML = `<div id="childnew"> This is HTML content </div>`
Output:
Conclusion
These are all the available methods(at least to my knowledge), If you remember any other methods, feel free to comment. 🤗
Thanks for reading till the end 😊 I have made a gitrepo for this, you can go through and work on this example, also try to complete the task which was mentioned in this article to get max benefit out of it. 💪💪